Essential Tools for Carpet Pad Cutting
To execute how to cut carpet pad effectively, you need the right tools. Good craftsmanship depends on good tools, and this applies to cutting carpet pads too. Here’s a list of essential tools that will make the job easier and more precise:

- Utility Knife: The utility knife is your primary tool for cutting carpet pad. Choose one with a comfortable grip and easy blade replacement system.
- Measuring Tape: A measuring tape is crucial to measure the carpet area and the pad before cutting. It helps ensure you cut the right size.
- Straight Edge: A long, straight edge helps guide your utility knife to make straight cuts. A metal ruler or a drywall T-square can serve this purpose.
- Marker: You’ll need a marker to draw cutting lines on the carpet pad. Use a pen or chalk that shows up on the pad’s surface.
- Knee Pads: While not a cutting tool, knee pads are essential for comfort and safety since you’ll be spending time on your knees.
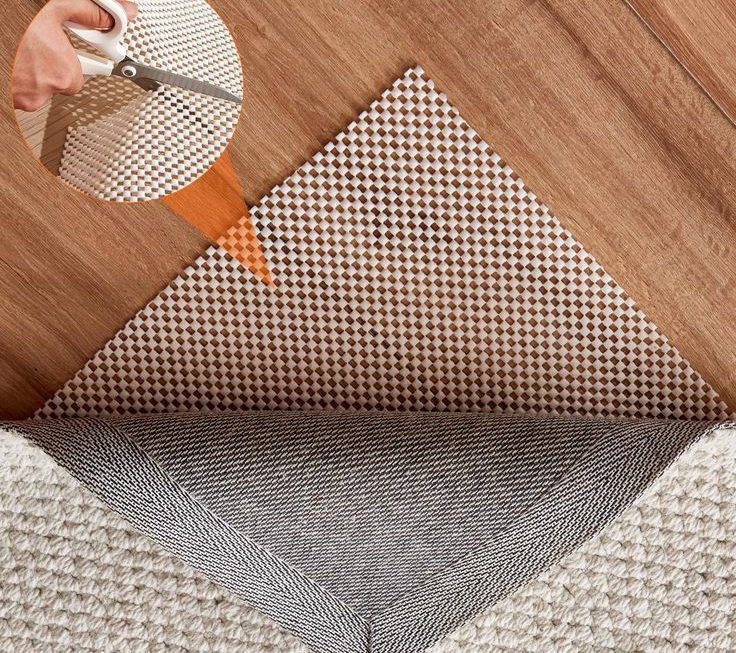
- Carpet Scissors: For areas where precision is key, and a utility knife doesn’t suffice, use carpet scissors.
These tools not only aid in precision but also help maintain safety throughout the cutting process. Make sure they are in good condition and appropriate for the task at hand before you start your project.
Preparing the Area for Cutting Carpet Pad
Before the actual cutting of the carpet pad begins, prepare the area properly. This preparation ensures a smoother process and prevents issues. Here are steps to follow:
- Clear the Space: Remove furniture and other items from the area. You need a clean and empty space to work with.
- Clean the Floor: Sweep or vacuum the floor. This removes debris that might interfere with the pad laying flat.
- Check the Subfloor: Inspect the subfloor for any imperfections. Repair if necessary, as these can affect the pad and carpet installation.
- Gather Your Tools: Have all your tools within reach before you start. Refer back to the essential tools for cutting carpet pad.
- Roll Out the Pad: Unroll the carpet pad in the area to let it acclimate. This can reduce wrinkles and make it easier to cut.
- Secure the Pad: Temporarily tape down the corners of the pad. It prevents the pad from moving while you measure and cut.
Preparing your workspace properly is critical to knowing how to cut carpet pad efficiently and accurately. Take your time with each step to set yourself up for success.
Measuring and Marking the Carpet Pad Accurately
Measuring and marking a carpet pad right is key to fitting it well. Here’s how you do it:
- Measure Twice: Before you cut, measure the area twice. You want precise numbers to work with.
- Use the Tape: Lay your tape measure flat on the pad. Record the length and width.
- Mark Guidelines: With your straight edge, draw lines where you will cut. Use your marker for visible lines.
- Double-Check: Look over your measurements and marks again. They must match the area of the room.
- Adjust for Walls: Remember to subtract a bit for wall clearance. The pad should not touch side walls.
- Highlight Corners: Clearly mark out where corners and angles are. These are crucial for fitting the pad right.
By taking your time to measure and mark the carpet pad, you avoid mistakes. Careful prep leads to a pad that fits snugly and looks great. After marking, you’re set for the next step: cutting the carpet pad.
Step-by-Step Process of Cutting Carpet Pad
Once you’ve measured and marked your carpet pad, it’s time to cut. Follow these step-by-step instructions to cut the carpet pad efficiently:
- Align the Straight Edge: Place your straight edge along the marked lines. This keeps your utility knife on track.
- Cut in Sections: Start with the longest straight line. Press down firmly and cut in one continuous motion.
- Repeat for Each Line: Move the straight edge to the next line. Repeat the cutting process until all lines are cut.
- Trim Edges: After the main cuts, trim any excess material. Use carpet scissors for better control of the cut.
- Cut Out Corners: If necessary, cut out corners. Be precise and make sure they fit the room’s angles.
- Check the Fit: Lay the cut pad onto the floor. Ensure there are no gaps or overlaps.
- Adjust if Needed: If you find discrepancies, trim carefully. Only remove small amounts to avoid cutting too much.
By following these steps, you should have a neatly cut carpet pad to fit your room’s dimensions. Take your time with each cut and always keep safety in mind.
 Tips for Smoother Cuts and Reduced Waste
Achieving smooth cuts and reducing waste is essential when learning how to cut carpet pad. Here are effective tips:
- Use a Sharp Blade: Always start with a sharp blade in your utility knife. A dull blade can snag and lead to uneven cuts.
- Hold the Straight Edge Firmly: As you cut, hold down the straight edge tightly to avoid slipping. This ensures straight, clean cuts.
- Work Slowly: Cutting slowly gives you better control and precision. Resist the urge to rush the job.
- Minimize Offcuts: Try to minimize waste by using the carpet pad efficiently. This may mean adjusting your measurements to fit pad dimensions.
- Recycle Leftovers: Keep leftover pieces for small areas or future repairs. This way, nothing goes to waste.
- Practice Makes Perfect: If you’re new to this, practice on scrap pieces. It helps you get a feel for the cutting process.
By following these tips, your carpet pad cuts will be smoother, which will make the installation look professional. Plus, mindful cutting helps lower costs by reducing waste. Keep these pointers in mind to enhance both the quality of your work and the efficiency of your resource use.
Safety Precautions When Cutting Carpet Pad
When diving into how to cut carpet pad, safety is paramount. Cutting tools are sharp, making caution essential. Here are safety tips:
- Wear Gloves: Protect your hands with cut-resistant gloves. It reduces the risk of cuts.
- Use Safety Glasses: Safety glasses shield your eyes from particles. Always wear them while cutting.
- Keep Blades Away: When not in use, retract the blade on your utility knife. Prevent accidental injuries.
- Work in a Well-lit Area: Good lighting helps you see clearly. You can cut more safely.
- Avoid Distractions: Concentrate fully on cutting. Distractions can cause mishaps.
- Keep First Aid Nearby: Have a first aid kit accessible. It’s useful for immediate care if an injury occurs.
- Teach Safety to Others: If others are around, instruct them on safety too. Keep children and pets away.
By following these steps, you can maintain a safe environment. This helps ensure that learning how to cut carpet pad does not lead to accidents. Keep these precautions in mind for every project.
Troubleshooting Common Cutting Mistakes
Even with careful preparation, cutting carpet pad can sometimes go wrong. Identifying and fixing mistakes quickly keeps the project on track. Here are common cutting mistakes and how to troubleshoot them:
- Incorrect Measurements: If the carpet pad doesn’t fit, double-check measurements. Sometimes a simple miscalculation is the culprit. Compare your figures with the room dimensions again and make adjustments as needed.
- Uneven Cuts: Wobbly lines can happen if the straight edge shifts. Secure the straight edge more firmly and use a sharp blade. Cut slowly for better control.
- Gaps or Overlaps: When the pad doesn’t align well with walls or corners, it’s often due to inaccurate marking. Re-measure and trim the carpet pad to ensure a precise fit.
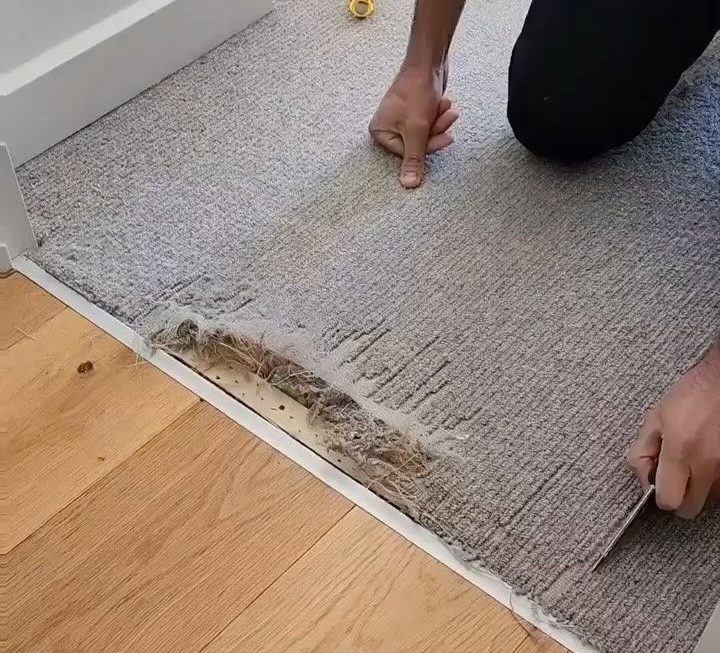
- Snags or Rips: A dull blade can snag the pad material. Replace the blade in your utility knife regularly to maintain a clean cut.
- Waste of Material: Inefficient use of the carpet pad leads to waste. Plan your cuts to optimize material use. Keep offcuts for future use or repairs.
When you encounter issues, stay calm and review your process. Small corrections can save the pad from being wasted and help maintain the quality of your work. Remember, practice improves precision in how to cut carpet pad.
 Finalizing and Installing Cut Carpet Pad
Checking Your Work
After cutting your carpet pad, review all pieces carefully. Make sure cuts are clean and fit well. Lay each piece on the floor to confirm it matches the room’s shape. Look for any uneven edges or inaccuracies now. This is easier to fix before moving on to installation.
Securing the Carpet Pad
Once you’re sure of the fit, it’s time to secure the pad. Use tape or staple guns, depending on the subfloor. Tape seams where pieces of pad come together. This prevents any shifting under the carpet. If staple guns are your choice, place staples close enough to hold the pad but not too close to cut it.
Installing the Carpet Over the Pad
After securing the pad, unroll the carpet. Start from one end of the room, ensuring to align it properly. Press the carpet into place over the pad. Use a knee kicker or carpet stretcher if needed. These tools help you pull the carpet tight. This tight fit prevents any wrinkles or movement.
Trimming Excess Carpet
After stretching, trim excess carpet at the walls. Leave just enough carpet to tuck into the space between the wall and floor. Use a wall trimmer or heavy-duty scissors for this job. Trim carefully to avoid cutting too much. Accuracy here affects the final look of your installation.
Attaching the Carpet to the Tack Strip
Finally, attach the edges of the carpet to the tack strip. This secures the carpet on all sides. Use a carpet tucker to push the edges into the strip’s hooks. This ensures a snug fit and a neat appearance around the perimeter of the room.
By following these steps on how to cut carpet pad and install it, your carpeting will look great and last longer. Always take your time and follow safety guidelines throughout the process.


