Introduction to DIY Carpet Binding
How to bind carpet edges? DIY carpet binding allows you to customize your carpet edges at home. It is a straightforward process that doesn’t require professional experience. This method is cost-effective, saving you the expense of hiring professionals. The simplicity of the procedure means that you can achieve a new look for your carpets in a short amount of time. Moreover, DIY binding is an excellent way to use leftover carpet pieces, reducing waste.
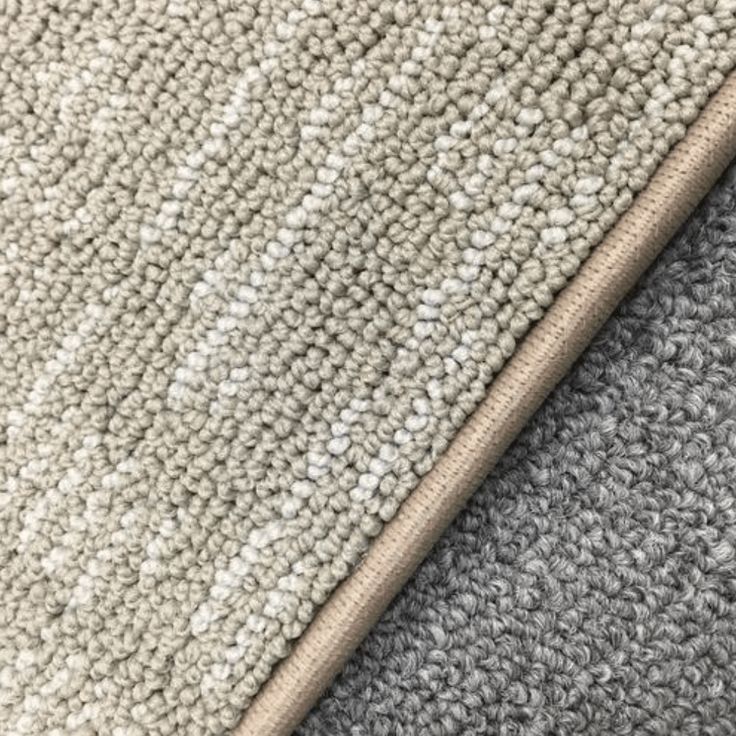
With basic tools and materials, you can bind the edges of your carpet to prevent fraying and enhance its appearance. In this guide, we will outline the necessary steps, tools, materials, and tips to help you successfully bind your carpet edges. Whether you’re looking to resize your carpet or simply tidy up worn-out edges, this guide will provide you with all the information you need to get started.
Important Tools and Materials Needed
To start binding your carpet edges, gather the right tools and materials. You’ll need some essentials:
- Double-sided carpet tape: This holds the binding strip in place.
- Carpet binding strip: It’s the external edge of your carpet.
- Utility knife: Use this to trim the carpet.
- Scissors: They help with cutting the tape and trim.
- Hot glue gun: Essential for sealing the edges.
- Hot glue sticks: To use with the gun for a strong hold.
- Safety gloves: To protect your hands during cutting and gluing.
- Small wood block or brick (optional): Helps apply even pressure when sealing.
- Lighter: For finishing the edges to prevent fraying.
Once you’ve got these items, you’re ready to begin the carpet binding process. Make sure to work on a clean, flat surface. Take your time with each step to ensure the best results. Remember, all these tools are widely available and won’t break the bank, making DIY carpet binding an affordable alternative to professional services.
Step-by-Step Guide to Binding Carpet Edges
Binding carpet edges at home is a simple DIY project. With the right tools and techniques, you can give your carpets and runners a professional looking finish. Follow this step-by-step guide to do it yourself:
- Measure and Trim Carpet: Firstly, measure the desired size of your carpet. Use a utility knife to precisely trim any excess material. This step is crucial for a tidy finish.
- Finish the Edges: To prevent fraying, lightly run a lighter along the freshly cut edges of your carpet. This melts down loose threads and creates a clean line.
- Apply Double-Sided Carpet Tape: Place strips of double-sided carpet tape along the edge of your carpet where the binding will go. This tape serves as the initial anchor for the binding strip.
- Attach Binding Strip: Carefully align the carpet binding strip with the edge of the carpet. Press it firmly onto the tape, ensuring it’s lined up straight for a neat appearance.
- Seal with Hot Glue: For extra security, use a hot glue gun to apply a thin strip of glue on the inner edge of the binding strip. This step binds the materials together more permanently.
- Apply Pressure: If needed, use a block of wood or brick to press the binding strip down firmly. This ensures good adherence to the carpet and a flat, even bond.
- Finish the Ends: When you come to the end of your binding, cut the strip to fit, and use a dot of hot glue to lock it in place. It should be nearly invisible against the start of the binding.
- Inspect and Adjust: Look over your work and make any necessary adjustments. The binding should be flush with the carpet edge, and corners should be neatly tucked.
That’s it! You’ve successfully bound your carpet edges. This method is straightforward and avoids the need for sewing or professional equipment.
Tips for Keeping Carpet Runner in Place
After binding your carpet edges, it’s essential to ensure your carpet runner stays securely in place. Here are some effective tips:
- Use Non-Slip Pads: Place non-slip pads underneath your carpet runner. These pads prevent slipping and add cushioning.
- Apply Carpet Tape: Double-sided carpet tape is effective for keeping runners fixed on the floor. Simply apply the tape along the underside edges.
- Install Carpet Grippers: In high-traffic areas, carpet grippers can be very useful. They anchor corners down, preventing bunching.
- Use Staple Gun for Stairs: If your runner is on the stairs, use a staple gun to secure it. Make sure to discreetly place staples under the edges.
- Employ Carpet Tacks: Carpet tacks are another secure method, especially for heavy-duty areas. They nail down the runner without being too invasive.
By implementing these simple strategies, your carpet runner will not only look good but will also stay in place, ensuring safety and durability.
Understanding Carpet Binding Tape and Its Uses
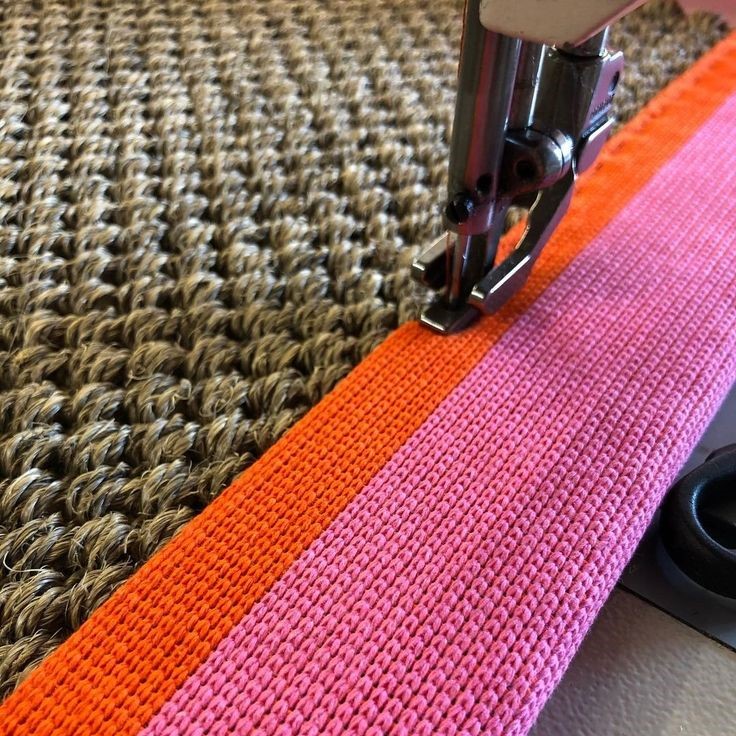
Carpet binding tape combines two essentials: tape and binding material. This double-duty tape streamlines the edge-finishing process, as it allows you to seal and bind the raw edges of your carpet without separate materials. When you use carpet binding tape, your carpet’s loose ends are neatly enclosed, preventing fraying and delivering a professional look.
Primarily, carpet binding tape is used for:
- Creating Custom Rugs: Transform carpet remnants into unique area rugs or runners.
- Repairing Damaged Edges: Fix carpets with worn-out edges instead of replacing them.
- Adjusting Rug Sizes: Reduce or reshape existing carpets to fit new spaces perfectly.
Choosing the right carpet binding tape involves considering the color and style that best suit your carpet. Contrasting colors can add an accent, while matching colors give a seamless look. Remember, patience and careful application are key to achieving a tidy finish. By following the DIY steps outlined earlier, you can apply carpet binding tape successfully to enhance your carpet’s durability and appearance.
Preparing Your Carpet for Binding
Before you start the binding process, proper preparation of your carpet is crucial for a successful outcome. Here’s how to prepare your carpet for binding:
- Measure and Adjust: Determine the final size you want your carpet to be. Measure carefully, and mark the cutting lines.
- Trim the Edges: Use your utility knife to cut along the marked lines. Make sure your cuts are straight and even for the best look.
- Seal Cut Edges: Run a lighter quickly along the cut edges. This melts stray fibers and prevents fraying.
- Clean the Work Area: Ensure your workspace is clean and flat. A tidy area prevents debris from sticking to your carpet tape.
- Gather Materials: Double check that you have all tools and materials handy. This makes the process smooth and uninterrupted.
By following these preparation steps, you’ll create a solid foundation for your DIY carpet binding project. Taking the time to prepare properly means you’re halfway to achieving those neat, professional-looking carpet edges.
Attaching the Binding Strips Correctly
To attach binding strips to your carpet edge, first lay your carpet flat. Ensure the surface is clean and your hands are safe by wearing gloves. Start by peeling off one side of the double-sided carpet tape. Stick it to the entire length of the carpet edge.
Next, line up the binding strip with the tape on the carpet edge. It should sit flush with the carpet’s edge. Press firmly as you go, attaching the strip evenly along the entire edge. Use a wooden block or brick to apply more pressure if needed.
When you reach the end of the binding, trim it neatly. Make sure the corner is tidy and aligned with the beginning of the strip. Secure the end with a dot of hot glue for a clean, professional finish.
Remember to work slowly and carefully check your alignment. This ensures a smooth, even look for your newly-bound carpet edges. With patience and precision, the binding strips will look seamless and firmly attached.
Sealing and Finishing the Edges
Once you’ve attached the binding strips, sealing is the next step. It’s essential for securing the edges and ensuring the rug endures everyday use. Here’s how to seal and finish the edges:
- Apply Hot Glue to Seal: Run a line of hot glue right where the carpet and binding meet. This locks the binding in place.
- Press to Secure: Use a wooden block or your hands to press the binding. This helps the glue set well.
- Check for Loose Ends: Go over the edges to spot any loose areas. Add more glue if needed.
- Let it Cool: Before using the rug, let the glue cool down. This makes the seal strong.
- Trim Excess Binding: If there’s any extra binding, trim it off. Keep the edges neat.
- Inspect Your Work: Look at your edges closely. Make sure they are even and secure.
- Fix Any Errors: If you spot a mistake, fix it now. Peel, re-align, and glue again if needed.
By following these steps, you’ll ensure your DIY-bound carpet has neatly sealed edges. It will look great and last longer. Now, you’re ready to enjoy your handiwork!
Optional: Adding a Grippy Carpet Pad
Adding a grippy carpet pad under your newly bound carpet can provide extra stability. These pads help prevent the carpet from sliding, making it safer to walk on. Especially on hard surfaces, a grippy pad ensures that your carpet stays in place. This is crucial for areas with high foot traffic or on slippery floors.
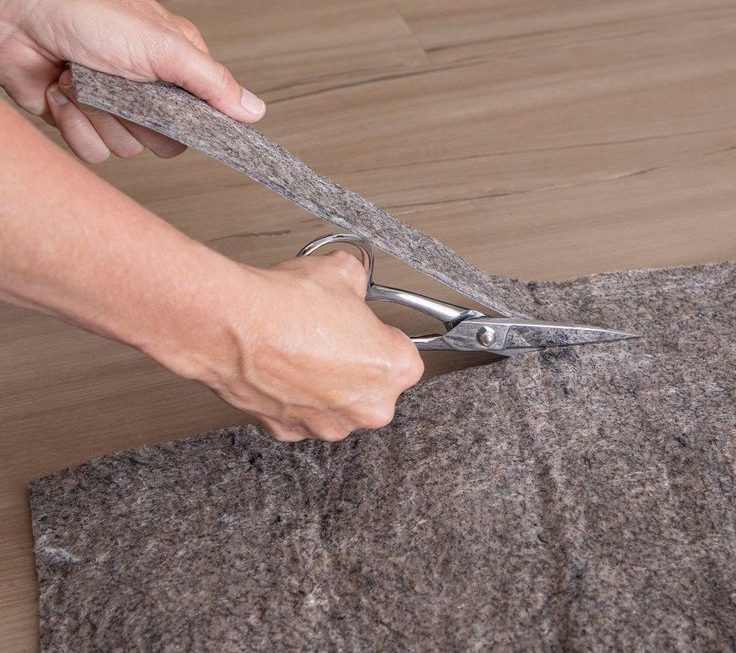
To install a grippy pad, simply cut it to match the size of your carpet. Place it directly under the carpet. Make sure it covers all areas that will likely experience movement. For added security, you can attach the pad to the carpet with double-sided carpet tape. This tape keeps both layers firmly together without damaging your floors.
Using a grippy carpet pad not only adds safety but also enhances the comfort underfoot. It provides additional cushioning, which feels nicer to walk on. This is particularly beneficial in homes with children or elderly family members. The pad also helps in reducing noise and adds a layer of insulation, making your space quieter and warmer.
Finally, remember to check the pad occasionally for wear and tear. Replace it as needed to maintain effectiveness and safety. With this simple addition, your DIY-bound carpet becomes even more functional and enjoyable to use.
Conclusion: Enjoying Your Newly Bound Carpet
You’ve now mastered how to bind carpet edges with ease. By following the steps provided, your carpets should look refreshed and professionally finished. DIY carpet binding not only saves money but also allows you to add a personal touch to your home decor. The process is simple, and the results are impressive.
With the right tools, such as double-sided carpet tape, binding strips, and a hot glue gun, you’ve been able to secure and enhance the appearance of your carpets. Whether you’ve corrected frayed edges or created a new area rug, the transformation is remarkable. And, by opting for a grippy carpet pad, you’ve increased the safety and comfort of your living space.
Practice makes perfect in DIY projects. If at first, the binding doesn’t turn out exactly as you hoped, don’t worry. Each attempt brings you closer to perfection. The joy of learning a new skill and applying it to improve your home is a reward in itself.
Take pride in your work and relish the fact that your efforts have breathed new life into your carpets. So, step back, admire your handiwork, and enjoy the cozier, more stylish floors you’ve achieved through DIY carpet edge binding.
